
© How To Iron Your Shirt?
Before we start, a few points will simplify the
ironing process as some expertise is required to iron a shirt:
Ø
Iron your
shirts in batches. The set-up process almost takes as much time as
ironing one shirt. So by ironing all your shirts at once, you’ll save time
versus ironing each one on separate days.
Ø
Check that the
baseplate of the iron is clean.
Ø
It is better
if you have an ironing board. But you can iron on any large enough flat
surface. Just put a clean cloth or towel under your shirt.
Ø
The shirt
should be slightly damp. Ideally, you need to iron the shirts shortly
after you get them out of the machine. Do not let them dry completely.
If they are too dry, then make them moist again simply by sprinkling
it from the spray gun.
Ø
Fully unbutton
the shirt before ironing, including the sleeves and buttons on the
collar.
Ø
Start ironing
with small parts, so it is less likely that the ironed parts will crumble
during further ironing.
Ø
The collar and
cuffs should be ironed from the wrong side. The rest of the shirt
is sewn from the front. Exception - shirts of dark fabrics, shirts in embroidery,
silk shirts.
Ø
For dark
coloured shirts – always iron inside out. This is to prevent fabric sheen (or
shiny iron marks) from popping out
Ø Check for stains BEFORE ironing. Ironing a dirty shirt can cause any stains or discolouration to settle permanently on the fabric.
Start With Under Side of The Collar

Begin at the edges of the underside of the collar and ironing towards the middle. It’s important that you go in this direction. Starting from the middle might cause the fabric to gain visible creases near the collar points.
Ironing The Cuff
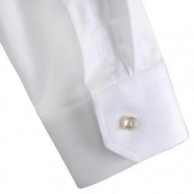
First, iron the inside of the cuffs to remove the main creases – again moving from the edges towards the middle. Finish off by ironing the outside area using the same method. Iron gently around the buttons.
Ironing The Sleeves 
Smooth out the sleeves with your hands before placing the iron over them. This helps prevent unwanted creases. Start with the tip of the iron at the cuffs – then work your way back to the shoulders. Flip the sleeve over to check if the other side needs a quick touch up.
Tackling The Back 
When ironing the back, you’ll have to be extra careful if your shirt has pleats. So I recommend that you start under the pleats before ironing on top of them. Then proceed with ironing the rest of the back (you’ll need to reposition the shirt several times on the flat surface to reach all edges and corner.
The Front And The Placket 
The next stage covers the front. Be gentle when ironing around buttons – you don’t want to damage them or make the threads go loose. Your aim is to get the placket nice and crisp since it’s one of most essential parts of your shirt. For the shirt pocket, start from the outside moving in to prevent creases.
The Front Of The Collar 
Finish up by ironing the front of the collar. Apply the same method you used in under side of collar, starting at the edges and working your way towards the middle.

